One of the main characters in The Energy Show is lab assistant i-nstein. Nina Dunn, responsible for Video Design and Animation Direction, and Mike Wyatt from Attack Animation were the masterminds behind bringing i-nstein to life. Take a look at their process here.
Design:
We started off with a few rough pencil sketches. Then some orthographic representations of the sketches were created in Photoshop. Extra detail was added into the basic form to add interest.

3D Model:
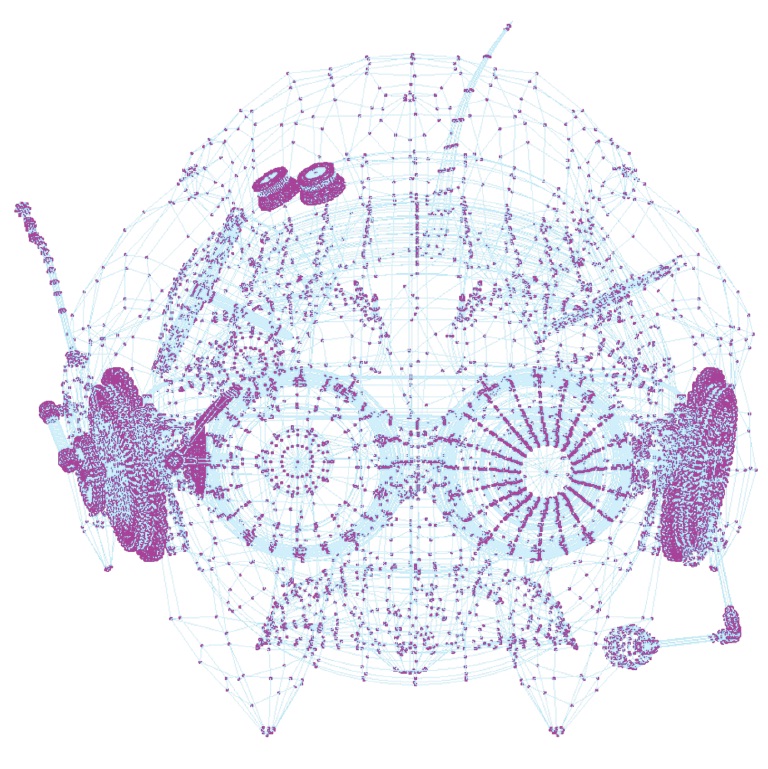
Using a 3D computer program such as ‘Maya’, the orthographic illustrations are used as reference to build i-nstein as a 3D polygonal model. The pink dots in the middle image are the vertices of the model. A ‘vertex’ is a point in 3D space. The blue lines are the ‘edges’ of the polygons, they are drawn between two vertices. A ‘face’ can be rendered between at least three vertices. It is best to use 4 vertices for each face, so the polygon which is drawn has 4 vertices and 4 edges draw between these vertices. We call these polygons ‘quads.’
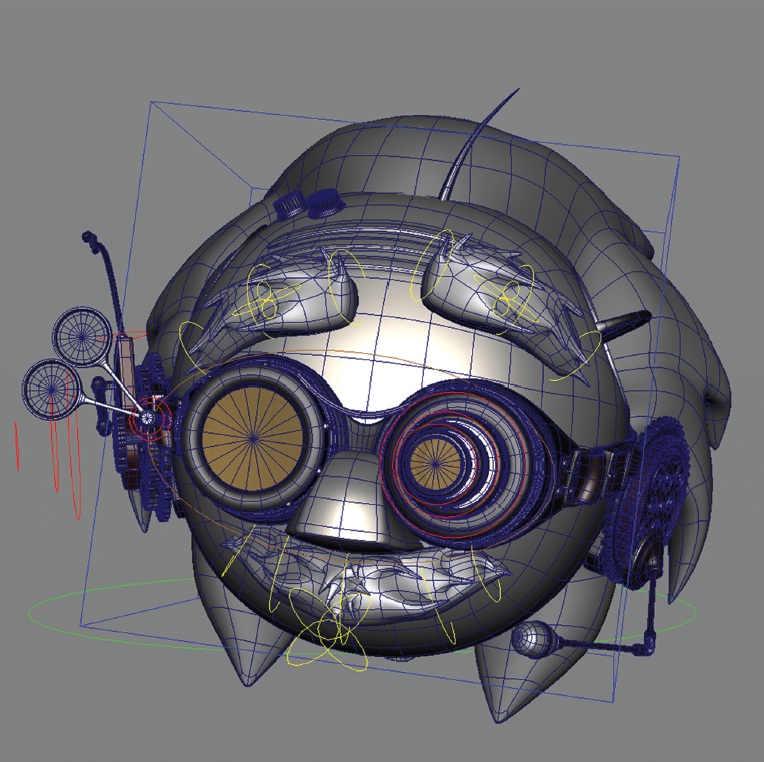
Rigging:
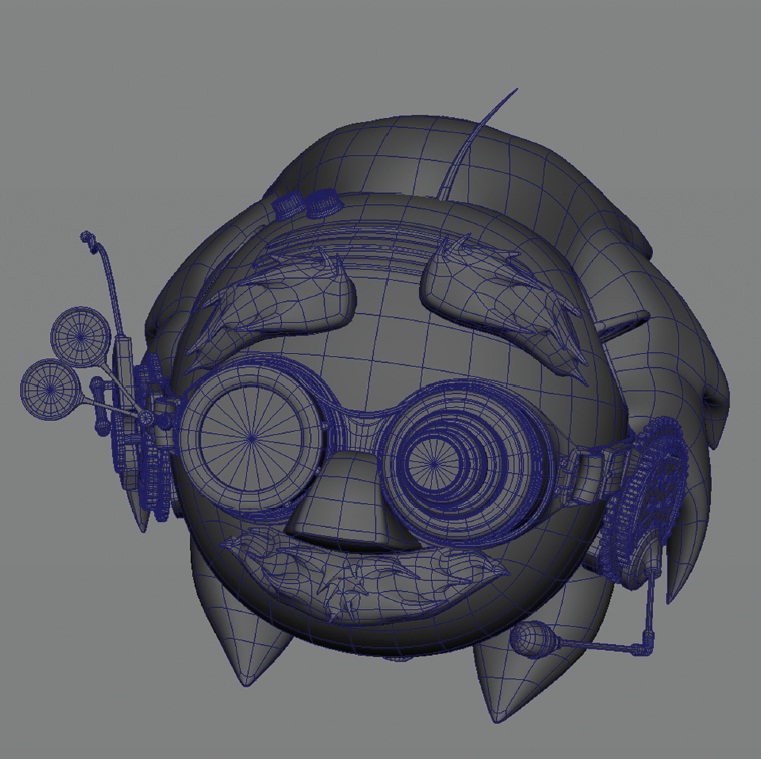
The next stage is called ‘rigging.’ This is where the puppet strings are built into the geometric model. The individual elements such as the eyebrows, the moustache, and the goggles are ‘skinned’ to curves and joints, before being placed under the influence of ‘controller curves.’ It is then possible to ‘pose’ each element of the model, and to achieve different emotions in the way in which each controller is positioned.
https://youtu.be/_gaJtKKZJ-U
Texturing:
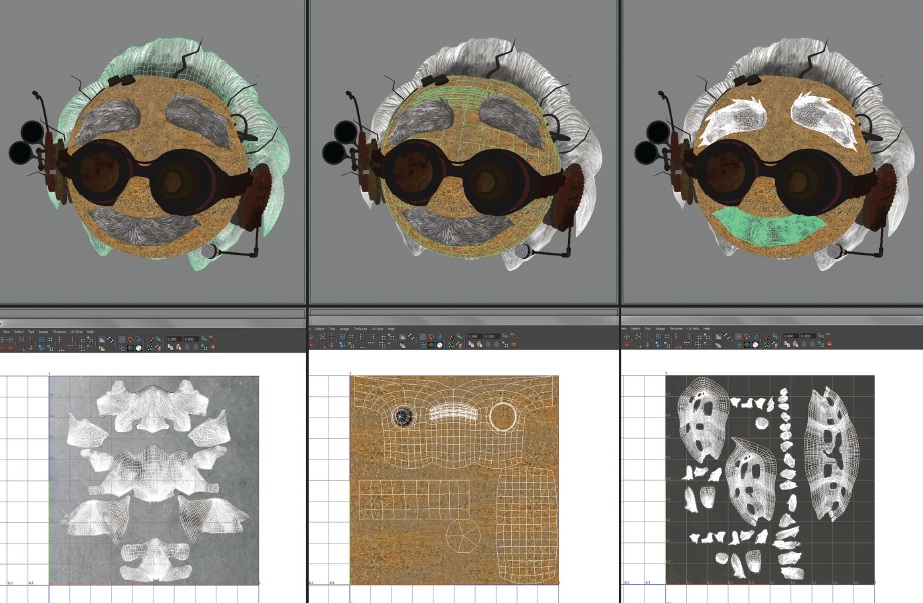
The ‘texturing’ process is where we add colour and shading to the model. The geometry is ‘mapped’, as if you were skinning an animal, so that the surface is laid out on a flat, 2D image. This is called ‘UV Mapping’. Using Photoshop, colour information can be painted onto these flat images, which the computer then wraps back around the model.
Animation:
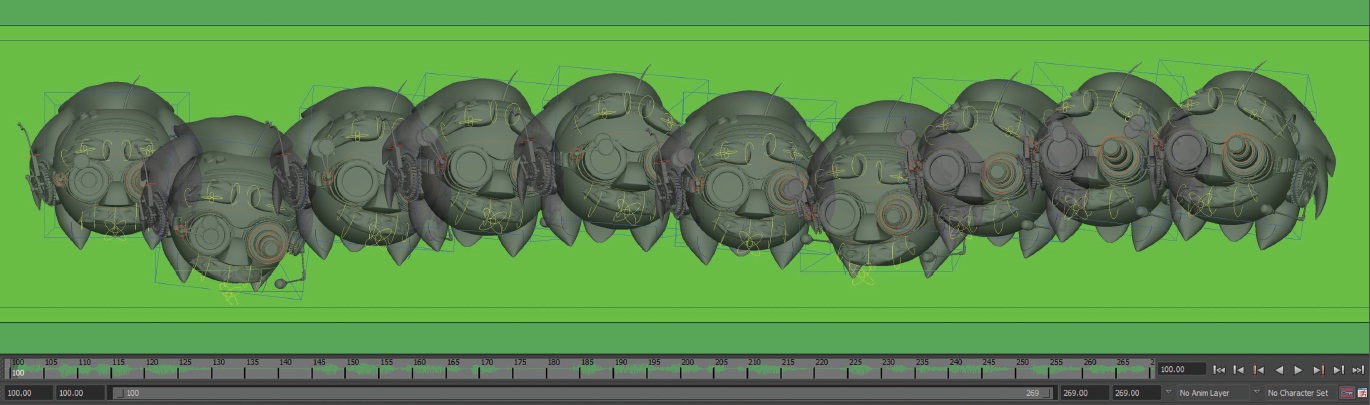
i-nstein is animated by posing him in different positions over time. The animator sets ‘keys’ on the time-line, and the computer fills in the spaces between the key frames. Once the animation is complete, a low quality ‘playblast’ movie is created so that the director can sign off the animation before the character is lit and rendered.
https://youtu.be/D3hZ6O1oVxk
Lighting:
Once the animation of a shot is complete, the model is replaced with a higher resolution ‘mesh.’ This Mesh has a much higher ‘poly-count’ than the low quality ‘proxy mesh’ used for animation. The more polygons the software has to display, the slower the feedback, so this is why make the substitution at this stage. Once the lighter is happy with the general mood and look of this view a render can be made.
Rendering:
A ‘render’ is a high quality, full resolution image of a particular frame of the animation. It brings all of the underlying elements together and outputs them as one single file. It can take a very long time for the computer to calculate. It took 60 seconds per frame to render i-nstein. There are 25 frames per second. To render 1 second of animation took 25 minutes. We produced about 9 minutes of animation, which took 225 hours to render. That’s almost 9 and a half days of rendering!

https://youtu.be/0-LSMagDPZo
i-nstein is starring in Science Museum Live: The Energy Show at the Science Museum until 31 August. Read more information and book tickets here.